Trợ giúp:Soạn thảo trực quan/Hướng dẫn sử dụng
| Lưu ý: Khi bạn sửa đổi trang này, bạn đồng ý phát hành đóng góp của bạn theo giấy phép CC0. Xem trang trợ giúp cộng đồng để biết thêm. |
| VisualEditor portal |
|---|
 |
| General |
| Giới thiệu |
| Giúp khánh thành |
| Nếu bạn muốn thử Trình soạn thảo trực quan mà không muốn phải chỉnh sửa một bài viết nào, đây là nơi để bạn có thể thử nghiệm thoải mái. Bạn không cần tài khoản để sử dụng trình soạn thảo trực quan trên trang này. |
Mở trình soạn thảo trực quan
Bắt đầu: thanh công cụ của trình soạn thảo trực quan
| Thanh công cụ của trình soạn thảo trực quan xuất hiện ở phía trên cùng của màn hình khi bạn bắt đầu chỉnh sửa. Thanh này bao gồm một số biểu tượng quen thuộc: | |
| Hoàn tác và Làm lại những thay đổi bạn đã thực hiện. | |
 |
Kéo xuống menu Đề mục: cho phép bạn thay đổi cách định dạng đoạn văn. Để thay đổi phong cách của một đoạn văn, đặt con trở chuột của bạn trong đoạn văn và chọn một mục trong menu này (bạn không cần nhấn mạnh bất kỳ văn bản nào). Các tiêu đề phần được định dạng "Đề mục", và các phụ phần là "Đề mục con 1", "Đề mục con 2",… Định dạng thông thường cho văn bản là "Đoạn văn". |
 |
Định dạng: Nhấn "A" sẽ mở ra một menu.
Nếu bạn chưa chọn bất kỳ văn bản nào, thì khi bạn nhấn "A" để mở trình đơn, rồi chọn một mục, định dạng đó sẽ áp dụng cho văn bản mà bạn bắt đầu nhập, từ bất cứ nơi nào đặt con trỏ của bạn. |
 |
Công cụ liên kết: Biểu tượng chuỗi là công cụ liên kết. Nhấn vào nó (thường sau khi chọn một số văn bản) sẽ mở ra hộp thoại liên kết. |
 |
Chú thích nguồn menu: Menu "Chú thích nguồn" được sử dụng để thêm các trích dẫn nội dòng (còn được gọi là "chú thích cuối trang" hoặc "tài liệu tham khảo"). Tất cả các dự án đều có quyền truy cập vào định dạng tham chiếu cơ bản và khả năng sử dụng lại các trích dẫn bằng cách sử dụng menu này. |
 |
Nút Chú thích: Nếu dịch vụ Citoid và/hoặc công cụ chú thích được bật trên wiki của bạn, bạn sẽ thấy nút Chú thích thay vì menu Chú thích nguồn.
(Hướng dẫn thêm các mẫu trích dẫn cục bộ vào menu Thủ công tại một wiki cụ thể có sẵn ở mục VisualEditor/Citation tool.) Hướng dẫn kích hoạt tab Tự động có sẵn tại Kích hoạt Citoid trên wiki của bạn Dịch vụ citoid cố gắng tự động điền vào các mẫu trích dẫn. |
 |
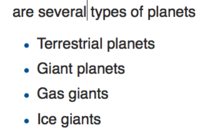
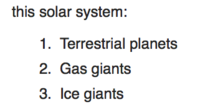
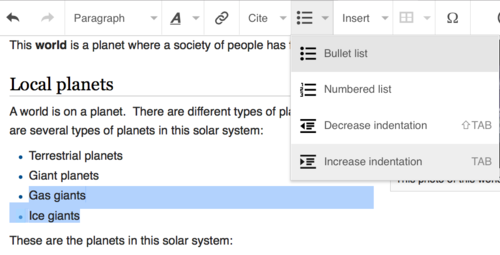
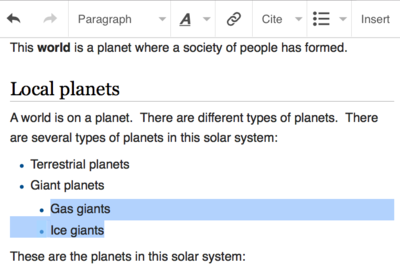
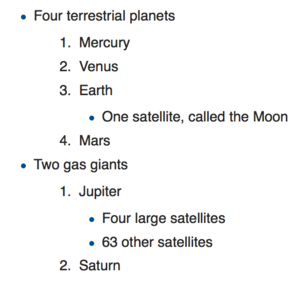
Danh sách và thụt lề: Hai mục đầu tiên cho phép bạn định dạng văn bản dưới dạng "Danh sách không đánh số" hoặc "Danh sách đánh số". Hai mục cuối cùng cho phép bạn giảm hoặc tăng mức thụt lề của các mục danh sách. |
 |
Chèn: Menu "Chèn" có thể khác nhau ở một số dự án. Dưới đây là danh sách các tùy chọn tất cả có thể xuất hiện.
|
| 'Chèn ký tự đặc biệt: Biểu tượng "Ký tự đặc biệt" (Ω) nằm bên cạnh menu "Chèn". Khi nhấn, nó hiển thị một hộp thoại hiển thị nhiều ký tự đặc biệt. Bằng cách nhấn vào một ký tự cụ thể, bạn đặt nó vào văn bản. Những ký tự đặc biệt này bao gồm một số biểu tượng tiêu chuẩn, dấu phụ và ký hiệu toán học. (Danh sách này có thể được tùy chỉnh cục bộ. Xem VisualEditor/Special characters để biết hướng dẫn.) | |
| Nút Chỉnh sửa thông báo hiển thị bất kỳ thông báo nào cho trang. | |
 |
Menu Tùy chọn trang nằm ở bên trái nút Đăng thay đổi và menu Chuyển chế độ sửa đổi. Trên menu này có một nút để mở hộp thoại Tùy chọn với các tab sau (bên trái) :
Các tab của hộp thoại Tùy chọn cũng được hiển thị trong menu Tùy chọn trang có thể được mở bằng cách nhấp vào nó. Hơn nữa, menu Tùy chọn trang chứa mục Xem trái sang phải hoặc Xem phải sang trái và Tìm và thay mở ra một hộp thoại nơi bạn có thể chèn các ký tự, thuật ngữ hoặc biểu thức chính quy mà bạn đang tìm kiếm và những biểu thức để thay thế chúng, cùng với một số nút dđể chọn. |
| Nút Chuyển chế độ sửa đổi nằm bên cạnh nút Đăng thay đổi Nó cho phép bạn chuyển sang trình soạn thảo wikitext. | |
Lưu thay đổi
Sửa liên kết
 |
Để đặt liên kết, hãy bấm nút “Liên kết” (hình dây xích) trên thanh công cụ, hoặc dùng tổ hợp phím tắt Ctrl+K (hoặc ⌘ Command+K trên Mac).
Nếu bạn chọn (đánh bật) văn bản và sau đó nhấn nút "Liên kết", văn bản đó sẽ được sử dụng trong việc tạo liên kết. Đối với một liên kết chỉ liên quan đến một từ, bạn có thể chọn từ đó hoặc chỉ cần đặt trình chiếu trong từ đó. |
 |
Dù bạn bấm nút hay bấm phím tắt, một hộp thoại sẽ xuất hiện mà bạn có thể nhập liên kết.
Công cụ liên kết sẽ giúp các liên kết "trên" bằng cách tìm kiếm những thứ phù hợp có thể. Sau khi nhập hoặc chọn tên bài, hãy bấm ↵ Enter hoặc nhấn chuột bên ngoài hộp thoại hay vào nút đóng (<). Liên kết sẽ xuất hiện trong Trình soạn thảo trực quan nhưng chỉ được lưu khi bạn lưu trang. |
 |
Để liên kết đến một trang trên một trang web khác, quy trình tương tự: Chọn tab “Trang ngoài” là nhập URL vào hộp. |
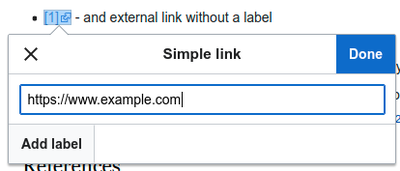 |
External links without labels look like this: [1]. You can add these by placing your cursor away from any word (e.g., after a space). Open the link tool by pressing on the button or pressing the shortcut keys. Type the URL in the box, and press the "Xong" button to insert the link. |
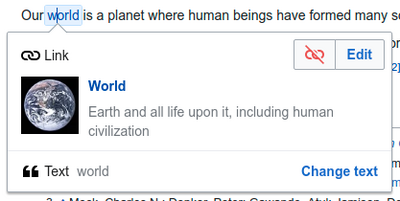 |
To change or remove an existing link, press within the text for that link, then press the "Liên kết" icon that appears near it. The dialog will appear, for editing. You can also get to the dialog with the Ctrl+K keyboard shortcut. When a link is selected, it appears as blue framed.
Bạn có thể sửa trang đích của liên kết hoặc xóa hẳn liên kết dùng nút “Remove” (hình thùng rác) ở góc phải bên trên của hộp thoại. You can also open the link's target in another window by pressing on the copy of the link in the dialog box. (You might want do this to check if an external link is valid.) If you want to exit the link label (the text displayed as a link) or continue to write after this link, you can press →:
To edit the link label of an existing link, press within the link label and type the new one. But if you want to replace the entire label, please note:
|
Sửa chú thích
- For further information, see Trợ giúp sử dụng bản mẫu chú thích hoặc Trợ giúp dùng citoid's tab Tự động
|
Định định hệ thống đang được áp dụng | |
| Wiki của bạn có thể sử dụng một trong ba hệ thống chú thích. Một trong những hiển thị ở bên phải là hệ thống đơn giản nhất, menu "Chú thích nguồn" không bao gồm bất kỳ bản mẫu chú thích nào. Nếu wiki của bạn sử dụng hệ thống này, thì tất cả mọi thứ bạn cần biết về chú thích đều trên trang này. |  |
| Trong hệ thống thứ hai, bạn tiếp tục bắt đầu bằng cách nhấn nút Chú thích. Sau đó một hộp thoại mở ra, bao gồm một số bản mẫu chú thích phổ biến được thiết lập để truy cập nhanh trong tab "Thủ công". Nếu wiki của bạn sử dụng hệ thống này, bạn sẽ tìm thấy thêm chi tiết tại Help:VisualEditor/User guide/Citations-Templates |  |
| Trong hệ thống thứ ba, bạn tiếp tục bắt đầu bằng cách nhấn nút Chú thích. Sau đó một hộp thoại mở ra, bao gồm một quy trình chú thích tự động sử dụng dịch vụ citoid dưới tab tự động. Nếu wiki của bạn sử dụng hệ thống này, bạn sẽ tìm thấy thêm chi tiết tại Help:VisualEditor/User guide/Citations-Full |  |
|
Sửa một chú thích đã tồn tại | |
| Để chỉnh sửa một tài liệu tham khảo hiện có, nhấn vào nó nơi nó xuất hiện trong văn bản (thường là một số đúc). Bạn sẽ thấy biểu tượng "Chú thích" (bảng sổ) hoặc biểu tượng (và tên) cho mẫu đã được sử dụng để tạo tài liệu tham khảo này. Trong cả hai trường hợp, nhấn vào nút "Sửa" sẽ mở một hộp thoại nơi bạn có thể chỉnh sửa tài liệu tham khảo. |  |
| For the "Chú thích" icon, pressing "Sửa" opens the reference dialog. To start changing the reference information, press on it.
Nhiều wiki sử dụng bản mẫu để chuẩn hóa các chú thích tham khảo. Các chú thích chứa bản mẫu được tô màu xanh khi được lựa chọn. If a template was used and you press on the reference information, then the Bản mẫu icon (puzzle piece) will appear with some information. Press on the "Sửa" button to edit the content of the template in the template editor dialog. |
 |
| If what appears when you press on a reference is an icon for a standard template for citations (an example is at right), then pressing "Sửa" will open the template editor dialog. |  |
| Inside the template editor, you can add or remove types of information or change current content. Only fields (template parameters) that have content will show, initially. To add fields, press on "Thêm tham số" at the bottom of the editor. |  |
| Sau khi đâu vào đấy, bấm nút “Áp dụng các thay đổi”. | |
Sử dụng lại một chú thích đã tồn tại | |
| If the page already contains a citation that applies to the text you want to source, then you can choose to re-use that existing citation.
Để sử dụng lại một chú thích đã tồn tại, đưa con nháy vào vị trí mà bạn muốn chèn chú thích, kéo xuống trình đơn “Insert” và chọn “⧼visualeditor-dialogbutton-reference-tooltip⧽”. (Note: If your wiki has the second or third footnote system described above, you'll see a "Tái sử dụng" tab, in a dialog, instead of a "Tái sử dụng" item on the "Chú thích nguồn" menu.) |
 |
| Nếu trang có nhiều chú thích, bạn có thể sử dụng hộp tìm kiếm (đề “Tìm kiếm trong chú thích hiện tại”) để lọc chú thích theo văn bản. |  |
Thêm chú thích mới | |
| Để thêm một chú thích mới, đưa con nháy vào vị trí mà bạn muốn chèn chú thích, kéo xuống trình đơn “Insert” trên thanh công cụ và chọn “⧼visualeditor-dialogbutton-reference-tooltip⧽” (hình dấu trang). Then click "Cơ bản". |  |
Using the "Cơ bản" citation | |
| Shown here is what you will see if you select the basic references item. Trong cửa sổ chú thích tham khảo, bạn có thể thêm, sửa, và trang trí lời chú thích của bạn.
Bạn có thể xếp chú thích này vào nhóm, để chèn danh sách chú thích theo nhóm dùng công cụ “⧼visualeditor-dialog-referencelist-title⧽”. |
 |
| Trong hộp thoại Tham chiếu, nếu bạn muốn bao gồm mẫu trích dẫn hoặc bất kỳ mẫu nào khác, trong tham chiếu mới của bạn, hãy nhấn biểu tượng Bản mẫu (mảnh ghép) trong menu thanh công cụ "Chèn" trong trình chỉnh sửa Tham chiếu. |  |
| Sau đó, tìm mẫu bạn muốn sử dụng, thêm nó và chỉnh sửa nó như bất kỳ mẫu nào khác. (Xem Sửa mẫu bên dưới, nếu bạn cần thêm thông tin về mẫu.)
Sau khi bạn chỉnh sửa xong mẫu mới của mình, hãy nhấn vào "Áp dụng các thay đổi" để quay lại trình chỉnh sửa Tham chiếu và "Áp dụng các thay đổi" một lần nữa để quay lại trang bạn đang chỉnh sửa. |
 |
| Nếu chưa có danh sách các tham chiếu trên trang (ví dụ: nếu bạn đang thêm tham chiếu đầu tiên cho trang), bạn cần chỉ định vị trí danh sách tham chiếu và văn bản của chúng, sẽ được hiển thị cho người đọc.
Đặt con trỏ ở nơi bạn muốn hiển thị danh sách tham chiếu (thường là ở cuối trang), mở menu "Chèn" và nhấn biểu tượng "Danh sách chú thích tham khảo" (ba cuốn sách). |
 |
| Nếu bạn đã xếp các chú thích vào nhóm, bạn có thể xác định một nhóm trong cửa sổ này, để chỉ liệt kê các chú thích trong nhóm này.
The final step in the References list dialog is to press "Chèn". |
 |
Using standard cite templates | |
| Your local wiki may have added extra citation templates to the "Chú thích nguồn" menu. If so, you have quick access to the most-used citation templates for your wiki. (Instructions for adding extra citation templates to your local wiki are available at VisualEditor/Citation tool.) |  |
| Pressing on a template icon such as "Cite book" will take you into the template editor for that template. Important information fields may be marked with an asterisk. While the most common fields will be shown, not all of them are required. |  |
| To add more parameters, scroll down in the template editor and press on the "Thêm tham số" option.
Press on "Chèn" when you are done. |
 |
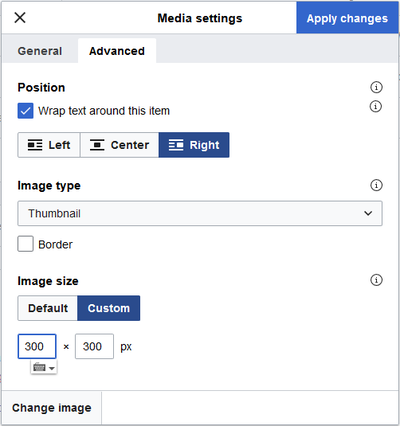
Editing images and other media files
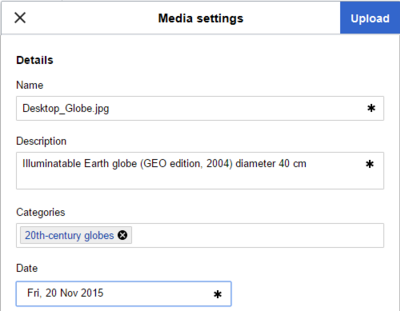
Uploading images
Editing media galleries
Sửa bản mẫu
The powerful MediaWiki template system lets you insert dynamic content, text from other pages, and much more. For a detailed explanation and examples, see the Templates help page.
In the VisualEditor you can search for a relevant template, add an invocation or transclusion on the page you’re editing and, if needed, add custom content using parameters.
Insert new template
| Để thêm một bản mẫu mới vào trang, đưa con nháy vào vị trí mà bạn muốn chèn bản mẫu, kéo xuống trình đơn “$template” trên thanh công cụ và chọn “$insert” (hình miếng ghép hình). Then open the Chèn menu and select " |
 |
| Find the template you want to insert by typing either its name or a relevant keyword. Results containing the search term in either the name or description will display in a dropdown. This should help you find a relevant template, even if you don’t know its exact name.
If you’re having trouble finding the kind of template you want by using keywords, you can look on other wiki pages with similar content and view or edit the page source to see which templates are in use. When you find the desired template’s name, you can type it into this field to insert it here. |
 |
| Để sửa một bản mẫu đã được chèn vào trang, lựa chọn nó – nó sẽ được tô đậm màu xanh – và bấm nút “$template” (hình miếng ghép hình) mà xuất hiện, hoặc nút "$edit" trên thanh công cụ. When you select the template you want to edit, it turns blue, and a box appears displaying " |
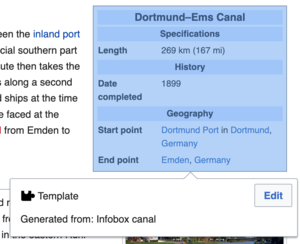 |
| Some templates are not visible to someone reading a page. In the visual editor, such hidden templates are still shown so that you can click and edit or delete them. The name of the template will be shown next to the puzzle icon and both will be grayed out. |  |
|
Tham số bản mẫu | |
| You’ll see this dialog box when you’re adding a new template or editing one already in place. What you see in the box depends on whether the template in question contains TemplateData, helpful metadata added by other editors to make it easier to edit templates in the Visual Editor.
When a template contains TemplateData, the VisualEditor can use it to present annotated fields for you to fill in.
|
 |
| You can disable any optional parameter (which have blue checkboxes on the left side). If a parameter’s checkbox is grayed out and not clickable, the template requires that parameter, so it can’t be disabled.
When you insert a new template, you may find that some optional parameters are pre-selected. That means the author(s) of the template recommends the use of those parameters. It’s best to review all parameters that will be used in a template to ensure you understand their use. Clicking an unchecked parameter adds it to the template. Clicking a parameter that’s already been added takes you to the parameter’s input field. Some template parameters will show as “deprecated”. Don’t use deprecated parameters when inserting a template; they’re only visible to you because those parameters are in use on older pages where this template was included. |
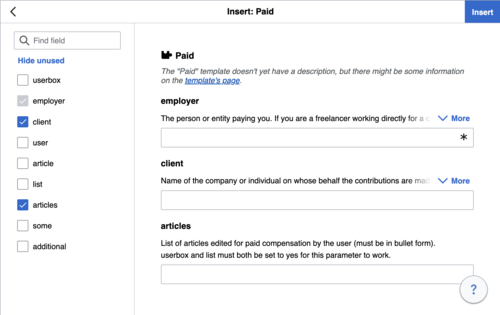 |
Adding undocumented parameters | |
| If you’re inserting or editing a template whose author hasn’t laid out its parameters in TemplateData, it has what we call “undocumented” or “unnamed parameters”. In these cases, you should consult the page for the template itself. There you can learn how to correctly employ and work with all of the template’s parameters. This includes learning the exact names of the parameters as written by the template author.
If you find in the documentation that the template expects parameters without names, fill in numbers as placeholders for the parameter names using the undocumented parameter input, then add text to the values you want to provide as you normally would. Example:
If you accidentally include nonexistent, misspelled or erroneous parameters, the values you enter for those parameters won’t show up on the page you’re editing. |
 |
Autogenerated parameters | |
| In this example, the template in question lacks TemplateData but it was possible to autogenerate the parameters. This means that the undocumented parameters have already been added for you, but the names may not be easily understandable and the dialog cannot display any directions or descriptions. As a result the dialog box provides a link to the template’s documentation, which should help you deduce and fill in the template’s various parameters. |  |
Editing multi-part template content | |
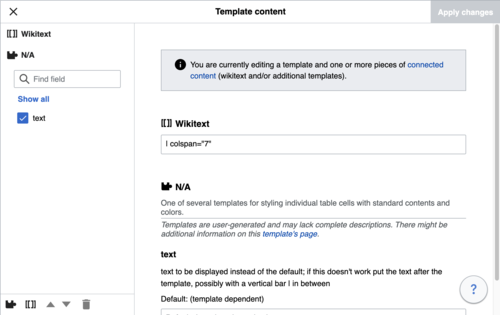
| During editing, you may open template content consisting of multiple templates or a single template linked to some wikitext. This differs from the nested templates described below. In this case, the templates are better visualized as being stacked or connected.
This content often contains “unbalanced templates,” templates which are incomplete on their own and need to be paired with some wikitext or another template in order to function. These related pieces of template content must be created in wikitext, but can be edited in the VisualEditor. In these cases you will see a notice at the top of the dialog to signal the situation and a specialized toolbar will be visible at the bottom of the sidebar. There you can use the icon buttons to add additional templates, additional wikitext, delete elements or change their order. |
 |
Nested templates | |
| Templates can include other templates as the value for parameters. You’ll recognize it when you see a parameter whose value contains the double curly braces ( {{ }} ) denoting a template.
The VisualEditor can’t present this template within a template (a nested template) using the editor’s easy-to-use interface, so if you want to nest a template yourself, you’ll need to understand how to add the template by hand in wikitext into the appropriate parameter field. |
 |
Completing your edit | |
| Sau khi xong xuôi, hãy bấm “Áp dụng các thay đổi” để đóng hộp thoại và trở về trình soạn thảo trang. Then you can preview your edit and make sure it looks the way you want and expect.
You may also see an error message, which (like the other TemplateData mentioned above) is community-provided content and may vary in usefulness. You may need to consult the template’s own documentation to get to the bottom of some errors. If you’re still having trouble, consider posting about your problem on the template’s talk page. |
|
Removing a template | |
| To remove a template in the VisualEditor, click the template box. Press the "Delete" or "Backspace" key on your keyboard. The template will disappear from the page. |  |
Editing on mobile | |
| When editing a template on a page using the VisualEditor on a mobile device, you’ll see that the sidebar starts out hidden. You can make it visible by pressing the “Show/hide options” button. |  |
Thay thế bản mẫu | |
| When you insert a template in a wiki page, its content and appearance are reevaluated every time the page loads, based on the template code and the values of its parameters. This means if someone updates the code of a template, then every page which uses that template will also get updated when they publish.
There’s another, much less common way to use templates, though, and that’s to substitute a template. Doing this permanently includes the template content just as it appears at the moment you insert it. It will not update if the template code is later changed. Most users won’t ever need to resort to substitution. Substitution is typically only useful when you need to capture the exact appearance of one version of a template, such as when content is under development and needs evaluation. To substitute a template in the VisualEditor, insert a template using the name syntax When you’re finished, press “Chèn”, which will insert the template content as you see it. |
 |
Sửa danh sách
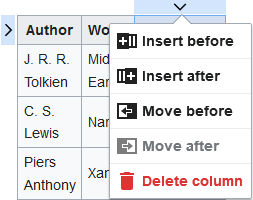
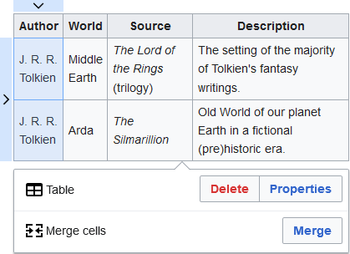
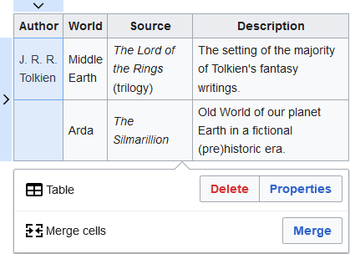
Editing tables
Sửa thể loại
 |
Trình đơn “Thể loại” cho phép truy cập nút “Tùy chọn trang”. |
 |
Nút “Thể loại” mở cửa sổ có danh sách các thể loại mà trang đã được xếp vào và cho phép xếp trang vào thêm thể loại.
Cửa sổ cũng cho phép tùy biến từ khóa sắp xếp, từ khóa này xác định vị trí của trang này trong danh sách trang của thể loại. For example, the default sorting key for the article "George Washington" is "Washington, George". In the category "Presidents of the United States", the article is listed under the letter "W", not the letter "G". |
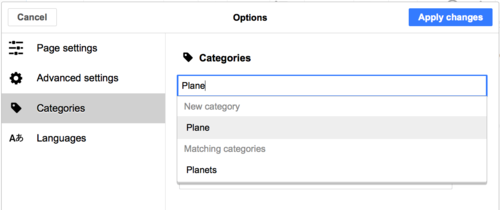 |
To add a category for a page, type the name of the category into the field "Thêm thể loại". As you type, the visual editor will search for possible matching, existing categories. You can either select an existing category, or you can add a category that doesn't yet have its own category page. (Until that category page is created, your new category will show as a red link after you publish all your editing changes.) |
 |
Để dời một thể loại đang chứa trang, nhấn chuột vào thể loại và bấm nút “Dời” (hình thùng rác) trong cửa sổ nổi lên.
Trong cửa sổ nổi lên, bạn cũng có thể tùy biến từ khóa sắp xếp riêng cho thể loại này, ghi đè từ khóa sắp xếp mặc định. |
| Sau khi đâu vào đấy, bấm nút “Áp dụng các thay đổi” để quay lại trình soạn trang. | |
Thay đổi tùy chọn trang
Editing maps
 |
You can add and change maps. See Help:VisualEditor/Maps. |
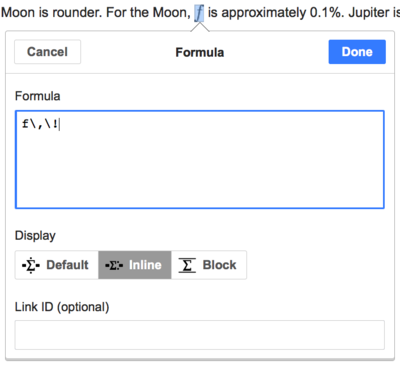
Sửa đổi công thức toán
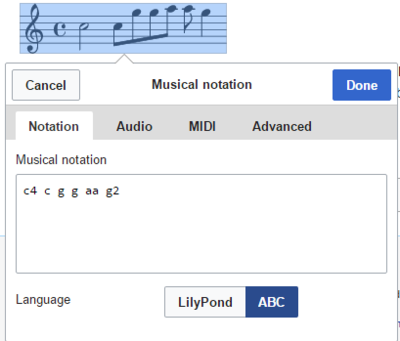
Editing musical scores
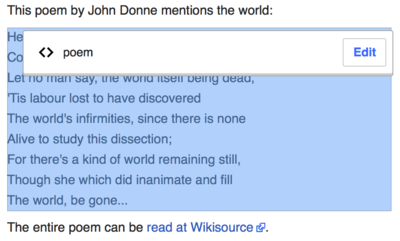
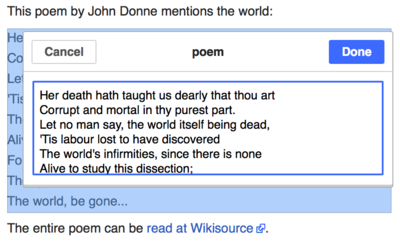
Sửa các bài thơ và các mục đặc biệt khác
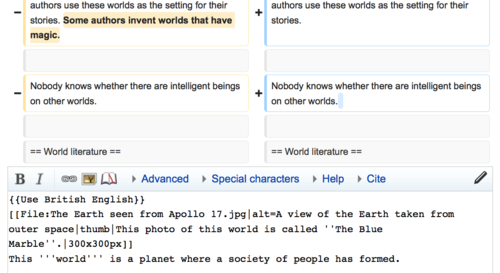
Switching between the visual and wikitext editors
Phím tắt
Nhiều người quen nhập mã wiki trực tiếp, nhất là mã viết đậm, xiên, và liên kết. Các phím tắt cho phép định dạng hóa văn bản nhanh lẹ mà không phải bấm nút trên thanh công cụ. Một số phím tắt thường gặp trong trình soạn khác cũng hoạt động trong Trình soạn thảo trực quan:
| Phím tắt PC | Tác động | Phím tắt Mac |
|---|---|---|
| Ctrl+B | Đậm | ⌘ Cmd+B |
| Ctrl+I | Xiên | ⌘ Cmd+I |
| Ctrl+K | Đặt liên kết | ⌘ Cmd+K |
| Ctrl+X | Cắt | ⌘ Cmd+X |
| Ctrl+C | Chép | ⌘ Cmd+C |
| Ctrl+V | Dán | ⌘ Cmd+V |
| Ctrl+Z | Hoàn tác | ⌘ Cmd+Z |
Also see the full list of all keyboard shortcuts.


