Kömək:Vizual redaktor/istifadəçi təlimatı
| Diqqət: Bu səhifəni redaktə etməklə, siz öz töhfənizin CC0 lisenziyası əsasında yayılmasına razılıq vermiş olursunuz. Bu barədə daha ətraflı məlumatı kömək səhifəsindən ala bilərsiniz. |
| VisualEditor portal |
|---|
 |
| General |
| Haqqında |
| Help with the launch |
| Əgər siz məqaləni redaktə etmədən vizual redaktoru sınamaq istəyirsinizsə, here is a page onu sərbəst sınaqdan keçirə bilərsiniz. Bu səhifədəki vizual redaktordan istifadə etmək üçün hesab lazım deyil. |
☛ Vizual redaktoru açmaq ☚
▏Vizual redaktorun alətlər paneli ▕

| "Vizual redaktorun alətlər paneli" siz redaktəni həmin redaktorun köməyi ilə edəndə səhifənin yuxarısında yerləşir və bir neçə simvolları və alətləri özündə əhatə edir. | |
| Edilən dəyişiklikləri Ləğv et və Qaytar. | |
 |
Paraqraf menyusu: paraqrafın formatını dəyişməyə imkan verir. Paraqrafın üslubunu dəyişdirmək üçün kursoru paraqrafın üzərinə gətirin və bu menyudan element seçin
(hər hansı mətni vurğulamağa ehtiyac yoxdur). Paraqrafın üslubunu dəyişdirmək üçün kursoru paraqrafın üzərinə gətirin və bu menyudan element seçin. Section titles are formatted "Başlıq", and subsections are "Alt başlıq 1", "Alt başlıq 2", and so on. The normal format for text is "Paraqraf". |
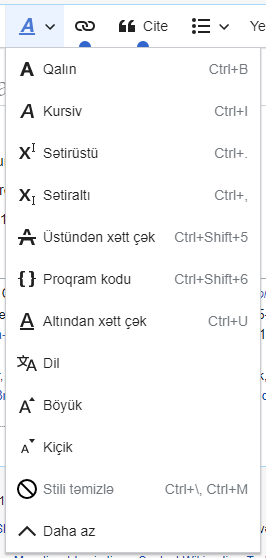 |
Ayrı-ayrı hərflərə vəya bütöv cümləyə fərqli font effektləri üçün: "A" düyməsinə toxunmanız kifayətdir.
If you have not selected any text, then when you press the "A" to open the menu, and then select an item, that formatting will apply to the text that you start typing, from wherever your cursor is located. |
 |
Linking tool: The chain icon is the linking tool. Pressing on it (usually after selecting some text) opens the link dialog. |
 |
İstinad menu: The "İstinad" menu is used to add inline citations (also called "footnotes" or "references"). All projects have access to basic reference formatting and the ability to reuse citations by using this menu. |
 |
İstinad button: If the Citoid service and/or citation tool is enabled on your wiki, you will see a İstinad button instead of a İstinad menu.
Instructions for adding local citation templates to the "Əllə" tab at a specific wiki are available at VisualEditor/Citation tool.) Instructions for enabling the Avtomatik tab are available at Enabling Citoid on your wiki The citoid service tries to fill out citation templates automatically. |
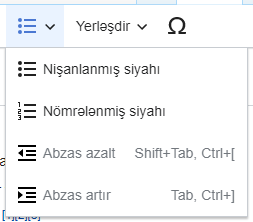 |
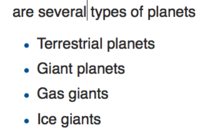
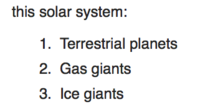
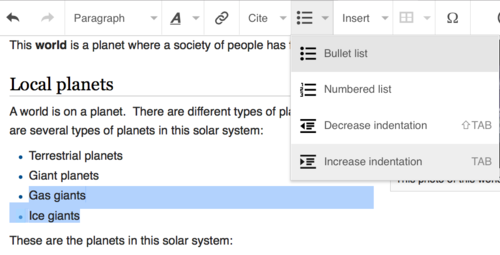
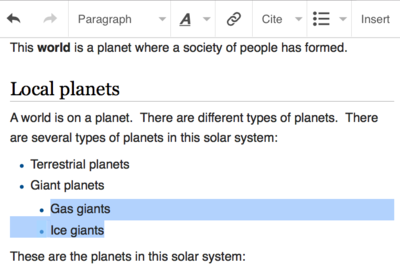
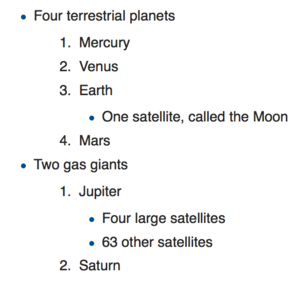
Siyahılar və abzaslar: ilk iki işarə sizə nömrələnmiş və nişanlanmış siyahılar yaratmağa imkan verir. Sonuncu iki işarə isə sizə məzmunun abzaslarının dərəcəsini artırmağa və azaltmağa imkan verir. |
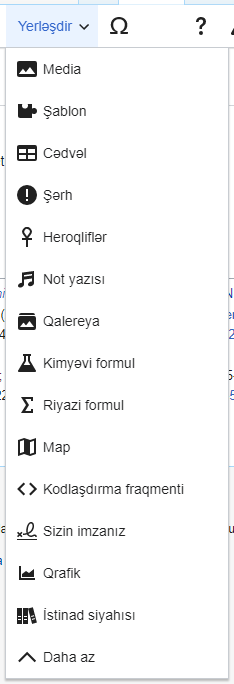 |
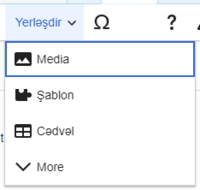
Multimedia, qeydlər və əlavələr: hər bir işarə aşağıdakı dialoqu çağırır:
|
| Special character insertion: The "Xüsusi işarələr" (Ω) icon is next to the "Yerləşdir" menu. When pressed, it displays a dialog showing many special characters. By pressing on a specific character, you place it into the text. These special characters include some standard symbols, diacritics, and mathematical symbols. (This list may be customized locally. See VisualEditor/Special characters for instructions.) | |
| The Edit notices button displays any notices for the page. | |
 |
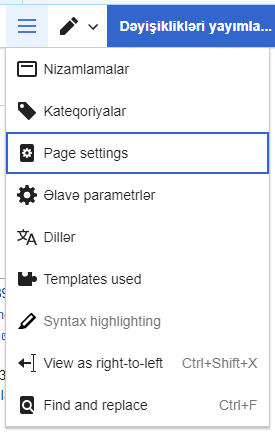
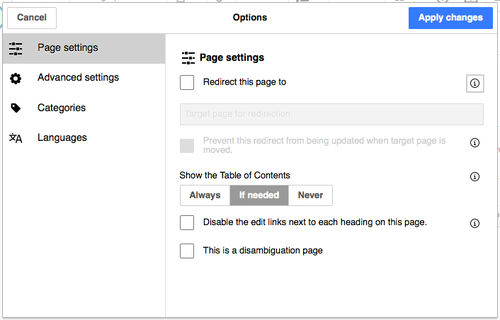
The Səhifə parametrləri menu is to the left of the Dəyişiklikləri yayımla button and the Redaktoru dəyiş menu. On this menu there is a button to open an Nizamlamalar dialog with the following (left side) tabs:
The tabs of the Nizamlamalar dialog are also displayed in the Səhifə parametrləri menu and can be opened by clicking on it. Furthermore the Səhifə parametrləri menu contains the items soldan-sağa olaraq bax or sağdan-sola olaraq bax and the item Tap və dəyiş, which opens a bar, where you can insert words or regular expressions you are searching for and those to replace them with, together with several buttons for options. |
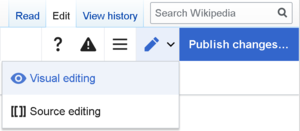
| The Redaktoru dəyiş button is next to the Dəyişiklikləri yayımla button. It allows you to switch to the wikitext editor. | |
Dəyişikliklərin yadda saxlanması
Keçidlərin redaktəsi
 |
Linklər alətlər panelindəki "$annotasiya" işarəsi (zəncirdəki keçidlər) və ya Ctrl+K (və ya Mac-da ⌘ Command+K) qısa yolundan istifadə etməklə əlavə edilə bilər.
If you select (highlight) text and then press the "Keçid" button, that text will be used in creating the link. For a link that involves only one word, you can either select that word or just put the cursor within that word. |
 |
Düymədən və ya klaviş birləşməsindən istifadə edərək keçid daxil etmək üçün dialoq pəncərəsini aça bilərsiniz. Siz daxili keçidlərlə (Vikipediyanın başqa səhifələrinə keçidlər) işə başlayan kimi Vizual redaktor uyğunluğu nəzərə alaraq, daxili keçidlərdən birini seçməyi təklif edəcək.
The link tool will try to help with internal links by searching for likely matches. Siz keçid daxil etdikdən və ya onu seçdikdən sonra ↵ Enter vura bilərsiz, paneldən kənarda klik edə və ya (<) işarəsini vura bilərsiz. Sizin keçid Vizual redaktorun səhifəsində görüləcək, lakin o siz səhifəni yadda saxlamayana qədər yadda saxlanılmayacaq. |
 |
Başqa bir veb saytdakı bir veb səhifəyə keçid vermək üçün proses oxşardır: "Xarici sayt" sekmesini seçin və qutuya bir URL daxil edin. |
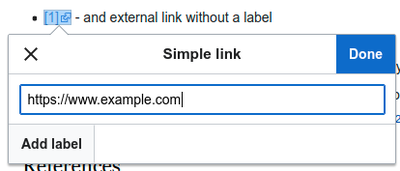 |
External links without labels look like this: [1]. You can add these by placing your cursor away from any word (e.g., after a space). Open the link tool by pressing on the button or pressing the shortcut keys. Type the URL in the box, and press the "Oldu" button to insert the link. |
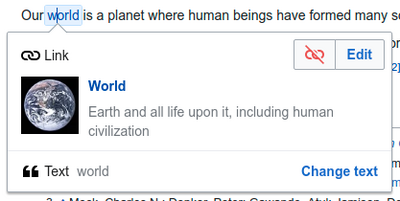 |
To change or remove an existing link, press within the text for that link, then press the "Keçid" icon that appears near it. The dialog will appear, for editing. You can also get to the dialog with the Ctrl+K keyboard shortcut. When a link is selected, it appears as blue framed.
Daha sonra siz məqsədli keçidi dəyişə və ya onu, dialoq pəncərəsinin sağ tərəfdə yuxarı küncdə yerləşən "Sil" düyməsini (zibil qabı şəkili) vurmaqla silə bilərsiz. You can also open the link's target in another window by pressing on the copy of the link in the dialog box. (You might want do this to check if an external link is valid.) If you want to exit the link label (the text displayed as a link) or continue to write after this link, you can press →:
To edit the link label of an existing link, press within the link label and type the new one. But if you want to replace the entire label, please note:
|
Qeydlərin redaktəsi
- For further information, see Help using citation templates or Help using citoid's Avtomatik tab
Determining which system is in place | |
| Your wiki may use one of three footnote systems. The one shown on the right is the simplest system, where the "İstinad" menu does not include any citation templates. If your wiki uses this system, then everything you need to know about footnotes is on this page. |  |
 | |
| In the second system, you again start by pressing the İstinad button. Then a dialog box opens, which includes several popular citation templates set up for quick access in the "Əllə" tab. If your wiki uses this system, then you will find more details at Help:VisualEditor/User guide/Citations-Templates |  |
| In the third system, you again start by pressing the İstinad button. Then a dialog box opens, which includes an automatic citation process using the citoid service under the Automatic tab. If your wiki uses this system, you will find more details at Help:VisualEditor/User guide/Citations-Full | 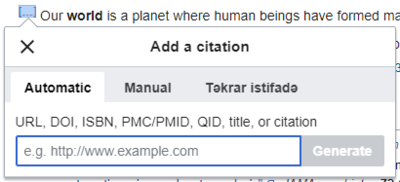 |
|
Mövcud qeydin redaktəsi | |
| To edit an existing reference, press on it where it appears in the text (usually as a bracketed number). You will see either a "İstinad" icon (bookmark) or an icon (and name) for the template that was used to create this reference. In either case, pressing on the "Redaktə" button will open a dialog where you can edit the reference. |  |
| For the "İstinad" icon, pressing "Redaktə" opens the reference dialog. To start changing the reference information, press on it.
Many wikis use templates to format references. If a template is used in your reference, then when you move your pointer over the reference information, all the information in that field will be highlighted. If a template was used and you press on the reference information, then the Şablon icon (puzzle piece) will appear with some information. Press on the "Redaktə" button to edit the content of the template in the template editor dialog. |
 |
| If what appears when you press on a reference is an icon for a standard template for citations (an example is at right), then pressing "Redaktə" will open the template editor dialog. |  |
| Inside the template editor, you can add or remove types of information or change current content. Only fields (template parameters) that have content will show, initially. To add fields, press on "Əlavə et" at the bottom of the editor. |  |
| Press on "Dəyişikliklərin tətbiqi" when you are done. | |
Mövcud istinadın yenidən istifadəsi | |
| If the page already contains a citation that applies to the text you want to source, then you can choose to re-use that existing citation.
To re-use an existing reference, place your cursor in the body of the text where you want to add a new reference (number) for that citation. Then press on the "Təkrar istifadə" item from the "İstinad" menu. (Note: If your wiki has the second or third footnote system described above, you'll see a "Təkrar istifadə" tab, in a dialog, instead of a "Təkrar istifadə" item on the "İstinad" menu.) |
 |
| In the İstinadlar dialog, look at the list for the reference you want to reuse, and select it. If there are many references, you can use the search box (labeled "Mövcud istinadlarda axtar") to list only those references that include certain text. |  |
Yeni istinadın əlavə edilməsi | |
| To add a citation using the "İstinad" menu, place your cursor where you want to add it in the text. Then click "Əsas". |  |
Using the "Əsas" citation | |
| Shown here is what you will see if you select the basic references item. In the Reference editor, you can add your citation, including formatting.
You can make the reference belong to a given group, although normally this is left blank. (This option is used to display groups of references with the "İstinad siyahısı" tool.) |
 |
| In the Reference dialog, if you want to include a citation template, or any other template, in your new reference, press the Şablon icon (puzzle piece) in the "Yerləşdir" toolbar menu within the Reference editor. | 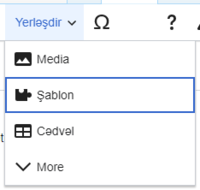 |
| Then, look for the template you want to use, add it and edit it as you would any other template. (See the Editing templates section, below, if you need more information about templates.)
After you are done editing your new template, press on "Dəyişikliklərin tətbiqi" to return to the Reference editor, and "Dəyişikliklərin tətbiqi" again to return to the page you are editing. |
 |
| If there isn't already a list of references on the page (for example, if you are adding the first reference for the page), you need to specify where the list of references, and their text, will be displayed to the reader.
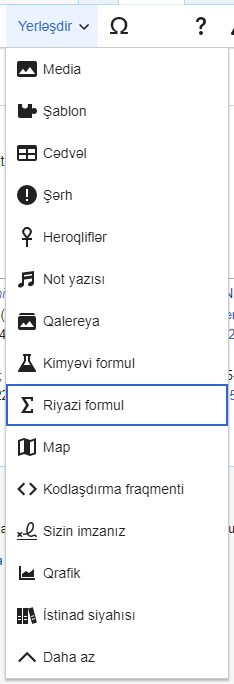
Place the cursor where you want to display the references list (usually at the bottom of the page), open the "Yerləşdir" menu and press the "İstinad siyahısı" icon (three books). |
 |
| If you are using several groups of references, which is relatively rare, you can specify the group in this dialog. Only the references that belong to that group will be displayed on the page at the location where you are placing the group.
The final step in the References list dialog is to press "Yerləşdir". |
 |
Using standard cite templates | |
| Your local wiki may have added extra citation templates to the "İstinad" menu. If so, you have quick access to the most-used citation templates for your wiki. (Instructions for adding extra citation templates to your local wiki are available at VisualEditor/Citation tool.) |  |
| Pressing on a template icon such as "Cite book" will take you into the template editor for that template. Important information fields may be marked with an asterisk. While the most common fields will be shown, not all of them are required. |  |
| To add more parameters, scroll down in the template editor and press on the "Əlavə et" option.
Press on "Yerləşdir" when you are done. |
 |
Editing images and other media files
Uploading images
Editing media galleries
Editing templates
The powerful MediaWiki template system lets you insert dynamic content, text from other pages, and much more. For a detailed explanation and examples, see the Templates help page.
In the VisualEditor you can search for a relevant template, add an invocation or transclusion on the page you’re editing and, if needed, add custom content using parameters.
Insert new template
| To add a template to a page, place your cursor at the position on the page where you want the template to be inserted. Then open the Yerləşdir menu and select " |
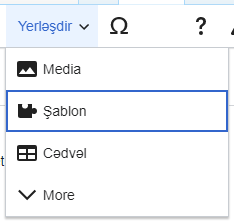 |
| Find the template you want to insert by typing either its name or a relevant keyword. Results containing the search term in either the name or description will display in a dropdown. This should help you find a relevant template, even if you don’t know its exact name.
If you’re having trouble finding the kind of template you want by using keywords, you can look on other wiki pages with similar content and view or edit the page source to see which templates are in use. When you find the desired template’s name, you can type it into this field to insert it here. |
 |
| You can also edit a template that’s already on a page. When you select the template you want to edit, it turns blue, and a box appears displaying " |
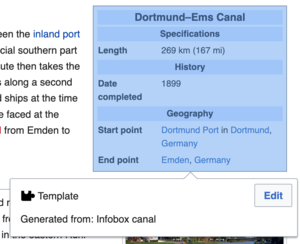 |
| Some templates are not visible to someone reading a page. In the visual editor, such hidden templates are still shown so that you can click and edit or delete them. The name of the template will be shown next to the puzzle icon and both will be grayed out. |  |
Template parameters | |
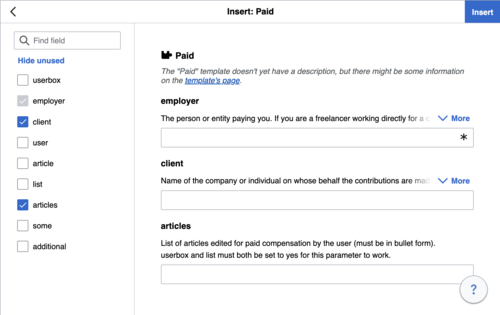
| You’ll see this dialog box when you’re adding a new template or editing one already in place. What you see in the box depends on whether the template in question contains TemplateData, helpful metadata added by other editors to make it easier to edit templates in the Visual Editor.
When a template contains TemplateData, the VisualEditor can use it to present annotated fields for you to fill in.
|
 |
| You can disable any optional parameter (which have blue checkboxes on the left side). If a parameter’s checkbox is grayed out and not clickable, the template requires that parameter, so it can’t be disabled.
When you insert a new template, you may find that some optional parameters are pre-selected. That means the author(s) of the template recommends the use of those parameters. It’s best to review all parameters that will be used in a template to ensure you understand their use. Clicking an unchecked parameter adds it to the template. Clicking a parameter that’s already been added takes you to the parameter’s input field. Some template parameters will show as “deprecated”. Don’t use deprecated parameters when inserting a template; they’re only visible to you because those parameters are in use on older pages where this template was included. |
 |
Adding undocumented parameters | |
| If you’re inserting or editing a template whose author hasn’t laid out its parameters in TemplateData, it has what we call “undocumented” or “unnamed parameters”. In these cases, you should consult the page for the template itself. There you can learn how to correctly employ and work with all of the template’s parameters. This includes learning the exact names of the parameters as written by the template author.
If you find in the documentation that the template expects parameters without names, fill in numbers as placeholders for the parameter names using the undocumented parameter input, then add text to the values you want to provide as you normally would. Example:
If you accidentally include nonexistent, misspelled or erroneous parameters, the values you enter for those parameters won’t show up on the page you’re editing. |
 |
Autogenerated parameters | |
| In this example, the template in question lacks TemplateData but it was possible to autogenerate the parameters. This means that the undocumented parameters have already been added for you, but the names may not be easily understandable and the dialog cannot display any directions or descriptions. As a result the dialog box provides a link to the template’s documentation, which should help you deduce and fill in the template’s various parameters. |  |
Editing multi-part template content | |
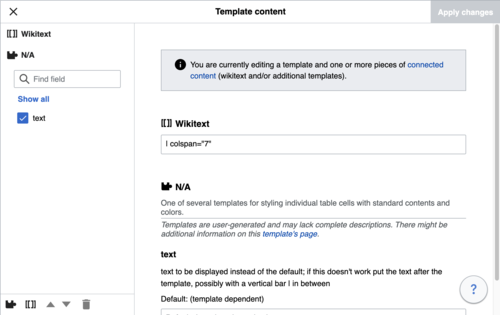
| During editing, you may open template content consisting of multiple templates or a single template linked to some wikitext. This differs from the nested templates described below. In this case, the templates are better visualized as being stacked or connected.
This content often contains “unbalanced templates,” templates which are incomplete on their own and need to be paired with some wikitext or another template in order to function. These related pieces of template content must be created in wikitext, but can be edited in the VisualEditor. In these cases you will see a notice at the top of the dialog to signal the situation and a specialized toolbar will be visible at the bottom of the sidebar. There you can use the icon buttons to add additional templates, additional wikitext, delete elements or change their order. |
 |
Nested templates | |
| Templates can include other templates as the value for parameters. You’ll recognize it when you see a parameter whose value contains the double curly braces ( {{ }} ) denoting a template.
The VisualEditor can’t present this template within a template (a nested template) using the editor’s easy-to-use interface, so if you want to nest a template yourself, you’ll need to understand how to add the template by hand in wikitext into the appropriate parameter field. |
 |
Completing your edit | |
| When you have finished editing a template, you can click "Dəyişikliklərin tətbiqi". Then you can preview your edit and make sure it looks the way you want and expect.
You may also see an error message, which (like the other TemplateData mentioned above) is community-provided content and may vary in usefulness. You may need to consult the template’s own documentation to get to the bottom of some errors. If you’re still having trouble, consider posting about your problem on the template’s talk page. |
|
Removing a template | |
| To remove a template in the VisualEditor, click the template box. Press the "Delete" or "Backspace" key on your keyboard. The template will disappear from the page. |  |
Editing on mobile | |
| When editing a template on a page using the VisualEditor on a mobile device, you’ll see that the sidebar starts out hidden. You can make it visible by pressing the “Show/hide options” button. |  |
Şablonların daxil edilməsi | |
| When you insert a template in a wiki page, its content and appearance are reevaluated every time the page loads, based on the template code and the values of its parameters. This means if someone updates the code of a template, then every page which uses that template will also get updated when they publish.
There’s another, much less common way to use templates, though, and that’s to substitute a template. Doing this permanently includes the template content just as it appears at the moment you insert it. It will not update if the template code is later changed. Most users won’t ever need to resort to substitution. Substitution is typically only useful when you need to capture the exact appearance of one version of a template, such as when content is under development and needs evaluation. To substitute a template in the VisualEditor, insert a template using the name syntax When you’re finished, press “Yerləşdir”, which will insert the template content as you see it. |
 |
Editing lists
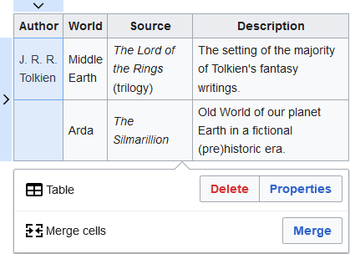
Editing tables
Kateqoriyaların redaktəsi
 |
To edit categories, on the "Səhifə parametrləri" menu, press the "Kateqoriyalar" item. |
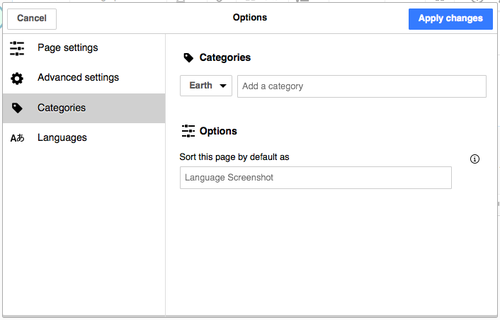 |
Pressing on "Kateqoriyalar" opens a dialog that lists existing categories and allows you to add new ones, and to delete existing categories.
You also have the option of setting or changing the general (default) sorting key, which determines where the page appears when listed with other pages in the same category. For example, the default sorting key for the article "George Washington" is "Washington, George". In the category "Presidents of the United States", the article is listed under the letter "W", not the letter "G". |
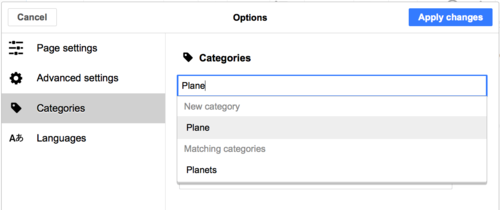 |
To add a category for a page, type the name of the category into the field "Kateqoriya əlavə et". As you type, the visual editor will search for possible matching, existing categories. You can either select an existing category, or you can add a category that doesn't yet have its own category page. (Until that category page is created, your new category will show as a red link after you publish all your editing changes.) |
 |
To remove an existing category, press on it and press on the "Sil" icon (trash can) in the dialog that opens.
Pressing on a category also allows you to specify a sorting key for that specific category. Such a sorting key overrides the default sorting key. |
| Press "Dəyişikliklərin tətbiqi" when you are done editing categories to return to the page editor. | |
Səhifə nizamlamalarını dəyişdirmək
Editing maps
 |
You can add and change maps. See Help:VisualEditor/Maps. |
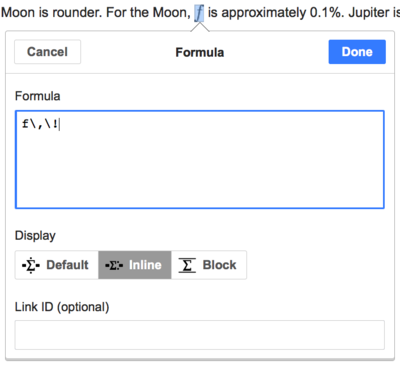
Editing mathematical formulae
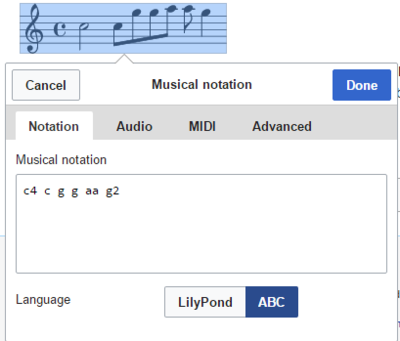
Editing musical scores
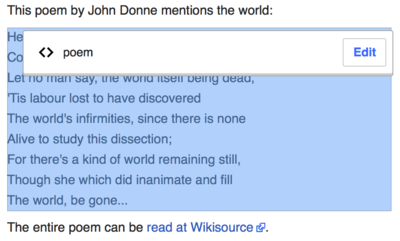
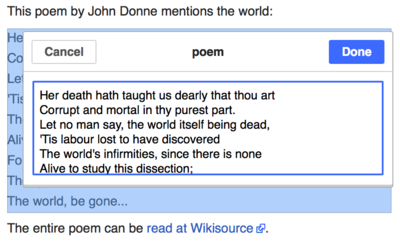
Editing poems and other special items
Switching between the visual and wikitext editors
Klaviş qısayolları
Many editors are used to entering wikitext directly, especially bold, italics and wikilinks. Keyboard shortcuts allow to quickly apply formatting without having to use toolbar items. Here are some of the most common shortcuts in the visual editor:
| PC birləşməsi | Nəticə | Mac birləşməsi |
|---|---|---|
| Ctrl+B | Qalın yazı | ⌘ Cmd+B |
| Ctrl+I | Maili yazı | ⌘ Cmd+I |
| Ctrl+K | Keçid daxil et | ⌘ Cmd+K |
| Ctrl+X | Kəs | ⌘ Cmd+X |
| Ctrl+C | Sürətini çıxar | ⌘ Cmd+C |
| Ctrl+V | Sürətini qoy | ⌘ Cmd+V |
| Ctrl+Z | Geri qaytar | ⌘ Cmd+Z |
Also see the full list of all keyboard shortcuts.

