ウィキベース/Docker
概要

これはウィキベーススイートをDockerを使って自身のコンピュータにインストールするためのステップバイステップのガイドです。
私たちのDockerイメージにはMediaWikiおよびウィキベースの完全なインストールが格納されており、自分のニーズに合わせてインストール過程をカスタマイズ可能です。
環境の準備
ウィキベースのインストールを始める前にこれらの手順をすべて完了してください。
Dockerのインストール
ウィキベースを実行したいコンピュータに、まずはDockerをインストールします。
Docker自身の手引きの他にヘルプが必要であれば、Linux、MacおよびWindows用のサードパーティのチュートリアルが参考になります。
ファイルをチェックアウト
サンプル構成ファイルを取得するために、GitHubからウィキベースのパイプラインリポジトリ をチェックアウトします。 最新のリリースは wmde.20 なので、以下のコマンドを実行します:
git clone https://github.com/wmde/wikibase-release-pipeline
cd wikibase-release-pipeline
git checkout tags/wmde.20
自分のファイルを準備
Create a new launch directory from which you will launch Docker. Bear in mind the name of that directory will appear in your Docker container names. For this example we will create the directory "wbdocker".
mkdir $HOME/wbdocker
cp -r example/* $HOME/wbdocker
cd $HOME/wbdocker
mv template.env .env
自分の環境をカスタマイズ
The .env file contains the environment variables that govern your Wikibase installation. You will need to edit this file and change the information on specific lines as follows.
MediaWiki の構成
- MW_ADMIN_NAME
- MW_ADMIN_PASS
- MW_ADMIN_EMAIL
These values define the username, password and email address of the administrative user in your new MediaWiki installation. このユーザー名とパスワードは、新しいインスタンスのウェブ インターフェイスに初めてログインする際に使用します。ここで入力したメールアドレスは、必要に応じてパスワードを再設定するためにも利用されます。 The password must be at least 10 characters and must not appear in the list of CommonPasswords.
この秘密鍵は一意である必要があります。MediaWiki はこれをいくつかの目的に使用します (セッション管理、暗号化エントロピー源の代わりなど)。 詳しくはリンクをご覧ください。 このファイルで使用するためにランダム文字列を生成するには:
echo -n "MW_SECRET_KEY="
tr -dc 'A-Za-z0-9@#%^+_-' </dev/urandom | head -c 64 ; echo ''
データベースの構成
- DB_NAME
- DB_USER
- DB_PASS
These values control the name of the database that MediaWiki will use, as well as the database username and password.
At the bare minimum, change DB_PASS:
echo -n "DB_PASS="
tr -dc 'A-Za-z0-9@#%^+_-' </dev/urandom | head -c 32 ; echo ''
ウィキベースの設定
- WIKIBASE_PINGBACK=false
既定では、Wikibase pingbackは無効です。
false を true に変更して、この機能を有効化する(これによって送信されるのは匿名化されたデータのみです)ことをご検討ください。
この機能を有効にすると、ウィキメディア・ドイツはウィキベースの使用状況の見識をはっきりと向上させることができ、より情報に基づいた開発方針の決定ができるようになります。 For more information, read our pingback documentation topic.
ホスト名
WIKIBASE_HOST=wikibase.svcWIKIBASE_PORT=80
WDQS_FRONTEND_HOST=wdqs-frontend.svcWDQS_FRONTEND_PORT=8834
QUICKSTATEMENTS_HOST=quickstatements.svcQUICKSTATEMENTS_PORT=8840
MW_ELASTIC_HOST=elasticsearch.svcMW_ELASTIC_PORT=9200
これらの行はウィキベースのホスト名とポート番号(ウィキベースにアクセスする際にブラウザのアドレス欄に入力するもの)および、オプションで、 拡張インストールのための外部サービスのものを設定します。
Sandbox users (those who want only a locally accessible setup on a single computer) can and should leave this section untouched.
However, if you plan to use any of the above external services outside of a self-contained Docker setup, you need to set WIKIBASE_HOST, WDQS_FRONTEND_HOST, QUICKSTATEMENTS_HOST and/or MW_ELASTIC_HOST to publicly accessible hostnames -- that is, hostnames that can be resolved in DNS -- or IP addresses.
The latter might be the right choice if you're running this on a local network.
localhostMAX_JOBS
You can specify that the job runner should run more jobs between restarts by setting MAX_JOBS higher than its default value of 1.
See below for more information on the job runner.
ウィキベースのインストールと実行
Now that you've installed all the needed software and customised your environment file, you have one more choice: whether to perform a minimal install (just MediaWiki, a backing MySQL database and Wikibase) or an extended install (MediaWiki, database, Wikibase, WDQS, Elasticsearch, QuickStatements).
最小インストール
For a minimal install, in the launch directory where you copied and modified your files, simply run:
docker-compose up -d
拡張インストール
For an extended install, in the launch directory where you copied and modified your files, run this extended command:
docker-compose -f docker-compose.yml -f docker-compose.extra.yml up -d
On some systems you will get an error message Unknown shorthand flag: 'f' in -f. In this case you need to install the docker-compose package through your package manager and run the command again.
オプション
If you need to run multiple job runners, you can add the following option (with X being the number of job runners to run) onto your docker compose command, as in this example:
docker-compose up -d --scale wikibase_jobrunner=X
Up and running
You will now have at least two Docker containers running.
To see your running containers, run docker compose ps.
The following example output is from an extended install:
$ docker ps
NAME                         COMMAND                   SERVICE              STATUS              PORTS
wbdocker-elasticsearch-1        "/usr/local/bin/dock…"    elasticsearch        running             9300/tcp
wbdocker-mysql-1                "docker-entrypoint.s…"    mysql                running             3306/tcp
wbdocker-quickstatements-1      "/bin/bash /entrypoi…"    quickstatements      running             0.0.0.0:8840->80/tcp, :::8840->80/tcp
wbdocker-wdqs-1                 "/entrypoint.sh /run…"    wdqs                 running             9999/tcp
wbdocker-wdqs-frontend-1        "/entrypoint.sh ngin…"    wdqs-frontend        running             0.0.0.0:8834->80/tcp, :::8834->80/tcp
wbdocker-wdqs-proxy-1           "/bin/sh -c \"/entryp…"   wdqs-proxy           running             80/tcp
wbdocker-wdqs-updater-1         "/entrypoint.sh /run…"    wdqs-updater         running
wbdocker-wikibase-1             "/bin/bash /entrypoi…"    wikibase             running             0.0.0.0:80->80/tcp, :::80->80/tcp
wbdocker-wikibase_jobrunner-1   "/bin/bash /jobrunne…"    wikibase_jobrunner   running             80/tcp

For some more helpful Wikibase-oriented Docker commands, check out the Docker tooling section of our maintenance documentation.
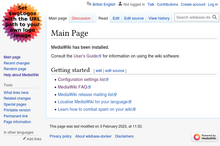
Log into your new Wikibase by navigating to your local machine's web server.
Job runner
The example docker-compose.yml sets up a dedicated job runner which restarts itself after every job, to ensure that changes to the configuration are picked up as quickly as possible.
If you run large batches of edits, this job runner may not be able to keep up with edits.
You can speed it up by increasing the MAX_JOBS variable in your .env file (see above), in order to run more jobs between restarts.
This change won't take effect in the job runner until you restart your docker compose project.
If you wish, you can also run several job runners in parallel by adding the option --scale wikibase_jobrunner=8 to the docker compose up command.
See the Installing section above.
サイトリンク
To create links between MediaWiki and Wikibase, run the add site script. You can learn more about adding sitelinks on the Wikidata sitelinks help page and the Wikibase advanced configuration page.
Using your new instance
Once all services have started, you can begin filling up, extending and customising your empty instance of Wikibase. Take a look at our setup resources page to get started.
