
Ajuda:Imatges
| Nota: Quan modifiqueu aquesta pàgina, esteu acceptant que la vostra contribució es publiqui en el marc de CC0. Mireu Pàgines d'ajuda de domini públic per a més informació. |
Aquesta pàgina explica la sintaxi de les imatges en modificar un wiki. Normalment, per poder utilitzar una imatge en una pàgina, algú l'ha d'haver carregat abans.
Les imatges que s'emmagatzemen en un servidor amb MediaWiki se solen mostrar amb el prefix d'espai de noms File: com a objectiu d'un enllaç de MediaWiki (però encara s'admet com a sinònim l'antic prefix Image:).
També hi ha el prefix Media:, que serveix per fer referència al contingut original del fitxer de mitjans (per mostrar-lo o descarregar-lo per separat, fora de tota pàgina de MediaWiki).
Requisits
Abans d'utilitzar imatges a la pàgina, l'administrador del sistema del wiki ha de tenir la càrrega de fitxers habilitat i un usuari ha d'haver carregat el fitxer. Els administradors del sistema també poden establir que el wiki pugui acceptar fitxers de repositoris externs, com ara Wikimedia Commons. Per a redimensionar la imatge per part del servidor, cal tenir configurat un escalador (com GD2, ImageMagick, etc.).
Tipus de fitxers permesos per a les imatges
Per defecte s'admeten els formats de fitxer següents:
.jpgo.jpeg- imatge de mapa de bits comprimida en el format JPEG estàndard (aquest format amb pèrdua és més adient per a les fotografies)..png- imatge de mapa de bits en el format PNG (especificat pel W3 Consortium)..gif- imatge de mapa de bits en el format obsolet GIF..webp- WebP permet la compressió amb pèrdua i sense pèrdua, mentre que redueix la mida de la imatge fins a un 45%.
Altres formats emprats a Wikimedia que sovint estan habilitats en altres llocs (poden necessitar una configuració addicional a l'habilitada per defecte):
.svg- imatge vectorial en el format SVG (especificat pel W3 Consortium). Vegeu Manual:Image Administration#SVG..tiff- Imatge de mapa de bits en el format TIFF. S'utilitza sovint per a fotografies arxivístiques en alta resolució. Sovint utilitzat amb Extension:PagedTiffHandler..ogg,.oga,.ogv- Multimèdia en format Ogg (àudio o vídeo). No és un format d'imatge, però es tracta semblantment. Sovint utilitzat amb Extension:TimedMediaHandler.pdf- documents multipàgina en el format PDF (originàriament especificat per Adobe). Sovint utilitzat conjuntament amb Extension:PdfHandler.djvu- documents de mapa de bits multipàgina en el format DejaVu (sobretot per a escanejats de llibres). Vegeu Manual:How to use DjVu with MediaWiki- Dels fitxers
.pdfi.djvu, a cada moment només se'n mostra una pàgina.
- Dels fitxers
Pot passar que s'admetin altres tipus de mitjans, però que no es puguin mostrar dins del cos de la pàgina.
Mostrar una imatge
Sintaxi
La sintaxi completa per mostrar una imatge és aquesta:
[[File:filename.extension|options|caption]]
on options pot estar buit o tenir una o més de les opcions següents, separades per barres verticals (|):
- Opció de format: border, i una de frameless, frame (o framed), o thumb (o thumbnail). Note: border can be used in combination with frameless but will be ignored if used with one of the other options.
- Controla com la imatge renderitzada es formata i s'incrusta a la resta de la pàgina.
- Opció de canvi de mida: una de
- {amplada}px: Redimensiona la imatge per a ajustar-la a l'amplada màxima indicada en píxels, sense restringir-ne l'alçada. (Només s'admeten els valors de nombre enter pels píxels. Es permet un caràcter d'espai entre el valor d'amplada i "px".)
- x{alçada}px: Redimensiona la imatge per a ajustar-la a l'alçada màxima indicada en píxels, sense restringir-ne l'amplada. Només s'admeten els valors de nombre enter pels píxels. Es permet un caràcter d'espai entre el valor de l'alçada i "px".
- {amplada}x{alçada}px: Redimensiona la imatge per a ajustar-la a l'amplada i alçada indicades en píxels. Només s'admeten els valors de nombre enter pels píxels. Es permet un caràcter d'espai entre el valor d'amplada i "px".
- upright — Redimensiona una imatge a un múltiple de les preferències de mida de les miniatures de l'usuari -o la mida per defecte de les miniatures, per als usuaris que han tancat la sessió o els usuaris que no han canviat les seves preferències- per a ajustar-se a unes dimensions raonables. Aquesta opció és sovint útil per a imatges l'alçada de les quals és més gran que la seva amplada. Requereix o thumb o frameless. En establir
|upright=1.0|es mostrarà la imatge a l'amplada per defecte de la imatge de l'usuari.|upright=2.0|mostrarà la imatge al doble de l'amplada per defecte de l'usuari.
- La imatge sempre mantindrà la seva relació d'aspecte.
- Les imatges en tipus de suports no escalables es poden reduir en mida, però no augmentar; p. ex., les imatges de mapa de bits.
- La configuració
uprightno requereix d'un signe d'igual, és a dir,|upright 2.0|funciona el mateix que|upright=2.0|. - Quan s'utilitza sense un valor o un signe d'igual (p. ex.,
|upright|), per defecte és|upright=0.75|(tot i que|upright=|és el mateix que|upright=1.0|) - La mida màxima per defecte depèn del format i de les dimensions internes de la imatge (d'acord amb el seu tipus de suport).
- Opció alineació horitzontal: una de left, right, center, none. Si hi ha escollida més d'una d'aquestes opcions, només s'utilitzarà la primera
- Controla l'alineació horitzontal (i els estils en línia/bloc o flotant) de la imatge dins d'un text (sense valor per defecte).
- Opció alineació vertical: una de baseline, sub, super, top, text-top, middle, bottom, text-bottom
- Controla l'alineació vertical d'una imatge en línia no flotant amb el text abans o després de la imatge, i en el mateix bloc (l'alineació vertical predeterminada és middle).
- Opció Link: una de
- link={enllaç}: Permet canviar l'objectiu (a un títol arbitrari de la pàgina o URL) de l'enllaç generat, activable a la superfície de la imatge presentada; p. ex.,
[[File:Example.jpg|20px|link=http://www.wikipedia.org]]es presenta com a (enllaç extern), o
 [[File:Example.jpg|20px|link=MediaWiki]]es presenta com a (enllaç intern). - link= (amb un valor buit): (MediaWiki 1.14+) Mostra una imatge sense cap enllaç activable; p. ex.
[[File:Example.jpg|20px|link=]]es presenta com a.
- Si hi ha un espai entre
linki el signe d'igual, l'expressió de l'enllaç es tractarà com a llegenda. - Incloure alguns equivalents de caràcters HTML, com ara
%22per", pot fer que l'expressió de l'enllaç es tracti com una llegenda (vegeu phabricator:T306216). - ! per a MW 1.24 i inferior: si establiu
|link=|(buit), no es presentarà captítol. (Vegeu phabricator:T23454).
- link={enllaç}: Permet canviar l'objectiu (a un títol arbitrari de la pàgina o URL) de l'enllaç generat, activable a la superfície de la imatge presentada; p. ex.,
- Altres opcions específiques:
- alt={text alternatiu} - (MediaWiki 1.14+) Defineix el text alternatiu (omplert a l'atribut HTML
alt="..."de l'element generat<img />) d'una imatge que es presentarà si la imatge referenciada no es pot descarregar i incrustar, o si els suports han d'utilitzar el text de descripció alternatiu (p. ex. quan s'utilitza un lector Braille o amb opcions d'accessibilitat establertes per l'usuari en el seu navegador).
- Si hi ha un espai entre
alti el signe d'igual, l'expressió alt es tractarà com a llegenda.
- page={number} — ** $1={nombre}: Presenta el número de pàgina especificat (actualment només és aplicable quan es mostra un fitxer .djvu o .pdf).
- thumbtime={number} — Renders a thumbnail from the video at the specified timestamp in seconds or MM:SS or HH:MM:SS format (only applicable when showing a video file).
- start={number} — When video playback is started it will start at the specified timestamp in seconds or MM:SS or HH:MM:SS format (only applicable when showing a video file).
- muted — When media playback is started, audio will be muted.
- loop — Media will loop continuously. (only applies to audio and video)
- lossy={false} — (PagedTiffHandler) For using PNG instead of JPG thumbnails for Tiff images
- class={html class} — (MediaWiki 1.20+)**
<span>...</span>={classe html}: ($2) Defineix les classes (assigna a l'atribut HTMLclass="..."de l'element<img />generat).
- alt={text alternatiu} - (MediaWiki 1.14+) Defineix el text alternatiu (omplert a l'atribut HTML
<img /> element.[2]- lang={language code} — (MediaWiki 1.22+) ** $1={codi d'idioma} - ($2) Per als fitxers SVG que contenen expressions <switch> que varien en un atribut systemLanguage, selecciona en quin idioma es presentarà el fitxer. El valor predeterminat és l'idioma de la pàgina (per defecte és l'idioma per defecte del projecte en la majoria dels projectes).
Si un paràmetre no coincideix amb cap de les altres possibilitats, s'assumeix que és el text de la llegenda. Si hi ha més d'una cadena que no és un paràmetre, s'utilitzarà la cadena que no sigui un paràmetre final com a llegenda. El text de la llegenda mostra a sota de la imatge en els formats thumb i frame, o com a text d'indicador de funció en qualsevol altre format. El text de la llegenda que es mostra en els formats thumb i frame pot contenir enllaços wiki i altres formats. Les extensions MediaWiki poden afegir opcions addicionals.
Si no s'especifica «alt» i es proporciona una llegenda, el text alternatiu es crearà automàticament a partir de la llegenda, sense format, excepte en el mode thumb o frame, ja que en aquest cas la llegenda ja és llegible pels lectors de pantalla.
Format
The following table shows the effect of all available formats.
| Description | You type | You get |
|---|---|---|
| no format specified Rendered as a floating block: no Rendered inline: yes Rendered caption: no |
... text text text [[File:example.jpg|caption]] text text text ... |
... text text text
|
| border results in a very small gray border Rendered as a floating block: no Rendered inline: yes Rendered caption: no |
... text text text [[File:example.jpg|border|caption]] text text text ... |
... text text text
|
| frameless, like thumbnail, respect user preferences for image width, but without border and no right float Rendered as a floating block: no Rendered inline: yes Rendered caption: no |
... text text text [[File:example.jpg|frameless|caption]] text text text ... |
... text text text
|
| frameless and border Rendered as a floating block: no Rendered inline: yes Rendered caption: no |
... text text text [[File:example.jpg|frameless|border|caption]] text text text ... |
... text text text
|
| frame Rendered as a floating block: yes Rendered inline: no Rendered caption: yes |
... text text text [[File:example.jpg|frame|caption]] text text text ... |
... text text text
 text text text ... |
| thumb or thumbnail Rendered as a floating block: yes Rendered inline: no Rendered caption: yes |
... text text text [[File:example.jpg|thumb|caption]] text text text ... |
... text text text
text text text ... |
When the height of an image in thumbnail is bigger than its width (i.e. in portrait orientation rather than landscape) and you find it too large, you may try the option upright=N, where N is the image's aspect ratio (its width divided by its height, defaulting to 0.75).
The alternative is to specify the desired maximum height (in pixels) explicitly.
Note that by writing thumb={filename}, you can use a different image for the thumbnail.
Size and frame
Among different formats, the effect of the size parameter may be different, as shown below.
- For how it appears when its size is not specified, see Format section above.
- When the format is not specified, or only
bordered, the size can be both reduced and enlarged to any specified size.
- In the examples below, the original size of the image is 400×267 pixels.
- An image with
framealways ignores the size specification; the original image will be reduced if it exceeds the maximum size defined in user preferences, and the page information will display a Linter error.
- The size of an image with
thumborframelesscan be reduced, but cannot be enlarged beyond the original size of the image.
| Format | Reduced | Enlarged |
|---|---|---|
| (not specified) |
[[File:example.jpg|50px]]
|
[[File:example.jpg|500px]]
|
| border |
[[File:example.jpg|border|50px]]
|
[[File:example.jpg|border|500px]]
|
| frame |
[[File:example.jpg|frame|50px]] |
[[File:example.jpg|frame|500px]]
|
| thumb |
[[File:example.jpg|thumb|50px]] |
[[File:example.jpg|thumb|500px]]
|
| frameless |
[[File:example.jpg|frameless|50px]]
|
[[File:example.jpg|frameless|500px]]
|
Horizontal alignment
Note that when using the frame or thumb[nail] formats, the default horizontal alignment will be right for left-to-right languages, and left for right-to-left languages.
| Description | You type | You get |
|---|---|---|
| no horizontal alignment specified, or default alignment Rendered as a floating block: no Rendered inline: yes |
... text text text [[File:example.jpg|100px|caption]] text text text ... |
... text text text
|
| specify horizontal alignment as: none Rendered as a floating block: no Rendered inline: no |
... text text text [[File:example.jpg|none|100px|caption]] text text text ... |
... text text text
text text text ... |
| specify horizontal alignment as: center Rendered as a floating block: no Rendered inline: no |
... text text text [[File:example.jpg|center|100px|caption]] text text text ... |
... text text text
text text text ... |
| specify horizontal alignment as: left Rendered as a floating block: yes Rendered inline: no |
... text text text [[File:example.jpg|left|100px|caption]] text text text ... |
... text text text
text text text ... |
| specify horizontal alignment as: right Rendered as a floating block: yes Rendered inline: no |
... text text text [[File:example.jpg|right|100px|caption]] text text text ... |
... text text text
text text text ... |
Vertical alignment
The vertical alignment options take effect only if the image is rendered as an inline element and is not floating. They alter the way the inlined image will be vertically aligned with the text present in the same block before and/or after this image on the same rendered row.
Note that the rendered line of text where inline images are inserted (and the lines of text rendered after the current one) may be moved down (this will increase the line-height conditionally by additional line spacing, just as it may occur with spans of text with variable font sizes, or with superscripts and subscripts) to allow the image height to be fully displayed with this alignment constraint.
<p style="border:1px solid #AAA;padding:0;font-size:150%;line-height:2">
<span style="background:#FFF;color:#000;text-decoration:overline"><u><del>text</del>
'''top:''' [[File:Example.jpg|20px|top]] [[File:Example.jpg|40px|top]] [[File:Example.jpg|100px|top]]
<del>text</del></u></span></p>

<p style="border:1px solid #AAA;padding:0;font-size:150%;line-height:2">
<span style="background:#FFF;color:#000;text-decoration:overline"><u><del>text</del>
'''text-top:''' [[File:Example.jpg|20px|text-top]] [[File:Example.jpg|40px|text-top]] [[File:Example.jpg|100px|text-top]]
<del>text</del></u></span></p>

<p style="border:1px solid #AAA;padding:0;font-size:150%;line-height:2">
<span style="background:#FFF;color:#000;text-decoration:overline"><u><del>text</del>
<sup>super:</sup> [[File:Example.jpg|20px|super]] [[File:Example.jpg|40px|super]] [[File:Example.jpg|100px|super]]
<del>text</del></u></span></p>

<p style="border:1px solid #AAA;padding:0;font-size:150%;line-height:2">
<span style="background:#FFF;color:#000;text-decoration:overline"><u><del>text</del>
'''baseline:''' [[File:Example.jpg|20px|baseline]] [[File:Example.jpg|40px|baseline]] [[File:Example.jpg|100px|baseline]]
<del>text</del></u></span></p>

<p style="border:1px solid #AAA;padding:0;font-size:150%;line-height:2">
<span style="background:#FFF;color:#000;text-decoration:overline"><u><del>text</del>
<sub>'''sub:'''</sub> [[File:Example.jpg|20px|sub]] [[File:Example.jpg|40px|sub]] [[File:Example.jpg|100px|sub]]
<del>text</del></u></span></p>

<p style="border:1px solid #AAA;padding:0;font-size:150%;line-height:2">
<span style="background:#FFF;color:#000;text-decoration:overline"><u><del>text</del>
'''default:''' [[File:Example.jpg|20px]][[File:Example.jpg|40px]] [[File:Example.jpg|100px]]
<del>text</del></u></span></p>

<p style="border:1px solid #AAA;padding:0;font-size:150%;line-height:2">
<span style="background:#FFF;color:#000;text-decoration:overline"><u><del>text</del>
'''middle:''' [[File:Example.jpg|20px|middle]] [[File:Example.jpg|40px|middle]] [[File:Example.jpg|100px|middle]]
<del>text</del></u></span></p>

<p style="border:1px solid #AAA;padding:0;font-size:150%;line-height:2">
<span style="background:#FFF;color:#000;text-decoration:overline"><u><del>text</del>
'''text-bottom:''' [[File:Example.jpg|20px|text-bottom]] [[File:Example.jpg|40px|text-bottom]] [[File:Example.jpg|100px|text-bottom]]
<del>text</del></u></span></p>

<p style="border:1px solid #AAA;padding:0;font-size:150%;line-height:2">
<span style="background:#FFF;color:#000;text-decoration:overline"><u><del>text</del>
'''bottom:'' [[File:Example.jpg|20px|bottom]] [[File:Example.jpg|40px|bottom]] [[File:Example.jpg|100px|bottom]]
<del>text</del></u></span></p>
To show the alignment result more clearly, the text spans are overlined and underlined, the font-size is increased to 200%, and the paragraph block is outlined with a thin border; additionally images of different sizes are aligned:
text
top: ![]()
![]()
text
text
text-top: ![]()
![]()
text
text
super: ![]()
![]()
text
text
baseline: ![]()
![]()
text
text
sub: ![]()
![]()
text
text
default: ![]()
![]()
text
text
middle: ![]()
![]()
text
text
text-bottom: ![]()
![]()
text
text
bottom: ![]()
![]()
text
Notes:
- The "middle" vertical alignment position of the image (which is also the default) usually refers to the middle between the x-height and the baseline of the text (on which the vertical middle of the image will be aligned, and on which usually the text may be overstroke), but not to the middle of the line-height of the font-height that refers to the space between the "text-top" and "text-bottom" positions ; the font-height excludes:
- the additional line separation spacing normally divided equally into two line-margins (here 0.5em, according to line-height set to 200%) above and below the font-height).
- the additional line spacing which may be added by superscripts and subscripts.
- However, if the image height causes its top or bottom position to go above or below the normal full line-height of text, the middle position will be adjusted after the increasing the top and/or bottom line-margins so that the image can fit and align properly, and all images (including those with smaller heights) will be vertically centered on the adjusted middle position (for computing the effective line-height, the text of each rendered row with the larger font-height will be considered).
- The "text-top" and "text-bottom" alignment positions also excludes the extra line spacing added by superscripts and subscripts, but not the additional line-spacing defined by the line-height.
- The "top" and "bottom" alignment positions take into account all these extra line spacings (including superscripts and subscripts, if they are present in a rendered line span).
When the image alignment constrains the image to grow above or below the normal line-spacing, and the image is not absolutely positioned, the image will cause the "top" and "bottom" positions to be adjusted (just like superscripts and subscripts), so the effective line-height between rendered lines of text will be higher.
- The "underline", "overline" and "overstrike" text-decoration positions should be somewhere within these two limits and may depend on the type and height of fonts used (the superscript and subscript styles may be taken into account in some browsers, but usually these styles are ignored and the position of these decorations may not be adjusted); so these decorations normally don't affect the vertical position of images, relatively to the text.
Stopping the text flow
On occasion it is desirable to stop text (or other inline non-floating images) from flowing around a floating image.
Depending on the web browser's screen resolution and such, text flow on the right side of an image may cause a section header (for instance, == My Header ==) to appear to the right of the image, instead of below it, as a user may expect.
The text flow can be stopped by placing <br clear=all> (or if you prefer, <div style="clear: both"></div>) before the text that should start below the floating image.
(This may also be done without an empty line by wrapping the section with the floating images with <div style="overflow: hidden">…</div>, which clears all floats inside the div element.)
All images rendered as blocks (including non-floating centered images, left- or right-floating images, as well as framed or thumbnailed floating images) are implicitly breaking the surrounding lines of text (terminating the current block of text before the image, and creating a new paragraph for the text after them). They will then stack vertically along their left or right alignment margin (or along the center line between these margins for centered images).
Altering the default link target
The following table shows how to alter the link target (whose default is the image description page) or how to remove it. Changing the link does not alter the format described in the previous sections.
| Description | You type | You get |
|---|---|---|
| internal link |
... text text text [[File:example.jpg|link=Main Page|caption]] text text text ... |
... text text text
|
| external link |
... text text text [[File:example.jpg|link=http://wikipedia.org/wiki/Test|caption]] text text text ... |
... text text text
|
| no link (external or file page) |
... text text text [[File:example.jpg|link=|caption]] text text text ... |
... text text text
|
Warning:
- The licencing requirements on your wiki may not allow you to remove all links to the description page that displays the required authors attributions, the copyrights statements, the applicable licencing terms, or a more complete description of the rendered image (including its history of modifications).
- If you change or remove the target link of an image, you will then have to provide somewhere else on your page an explicit link to this description page, or to display the copyright and author statement and a link to the applicable licence, if they are different from the elements applicable to the embedding page itself.
- Your wiki policy may restrict the use of the alternate link parameter, or may even enforce a prohibition of alternate link parameters for embedded media files (in which case, the link parameter will be ignored), or may only accept them after validation by authorized users or administrators.
Rendering a gallery of images
Gallery syntax
It's easy to make a gallery of thumbnails with the <gallery> tag.
The syntax is:
<gallery>
File:file_name.ext|caption|alt=alt language
File:file_name.ext|caption|alt=alt language
{...}
</gallery>
Note that the image code is not enclosed in brackets when enclosed in gallery tags.
Captions are optional, and may contain wiki links or other formatting.
Some of the parameters controlling thumb output can also be used here, specifically the ones that modify the file (as opposed to ones that control where in the page the image falls).
For example, with multi-paged media like pdfs, you can use code like page=4 and with videos you can use thumbtime=10.
The File: prefix can be omitted.
However, it is helpful to include it as an aid for quickly locating image specifiers in the wikitext (for example, when cleaning up page layout).
For example:
<gallery>
File:Example.jpg|Item 1
File:Example.jpg|a link to [[Help:Contents]]
File:Example.jpg
File:Example.jpg|alt=An example image. It has flowers
File:Example.jpg|''italic caption''
File:Example.jpg|Links to external website|link=https://example.com
File:Example.jpg|link=w:Main_Page|Internal link
Example.jpg|on page "{{PAGENAME}}"
File:Using Firefox.pdf|page=72
</gallery>
is formatted as:
-
 Item 1
 -
a link to Help:Contents
-
-
-
italic caption
-
Links to external website
-
Internal link
-
on page "Images/ca"
-


mode parameter
| MediaWiki version: | ≥ 1.22 |
Starting in 1.22 a mode parameter is available, taking options as follows:
traditionalis the original gallery type used by MediaWiki.
nolinesis similar totraditional, but with no border lines.
packedcauses images to have the same height but different widths, with little space between the images.
The rows in this responsive mode organize themselves according to the width of the screen.
packed-overlayshows the caption overlaid on the image, in a semi-transparent white box.
packed-hoveris similar topacked-overlay, but with the caption and box only showing up on hover.
slideshowcreates a slideshow of the images.
For example:
<gallery mode="packed-hover">
Image:Astronotus_ocellatus.jpg|''[[commons:Astronotus ocellatus|Astronotus ocellatus]]'' (Oscar)
Image:Salmonlarvakils.jpg|''[[commons:Salmo salar|Salmo salar]]'' (Salmon Larva)
Image:Georgia Aquarium - Giant Grouper.jpg|''[[commons:Epinephelus lanceolatus|Epinephelus lanceolatus]]'' (Giant grouper)
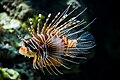
Image:Pterois volitans Manado-e.jpg|''[[commons:Pterois volitans|Pterois volitans]]'' (Red Lionfish)
Image:Macropodus opercularis - front (aka).jpg|''[[commons:Macropodus opercularis|Macropodus opercularis]]'' (Paradise fish)
Image:Canthigaster valentini 1.jpg|''[[commons:Canthigaster valentini|Canthigaster valentini]]'' (Valentinni's sharpnose puffer)
Image:Flughahn.jpg|[[Image:POTY ribbon 2007.svg|25px]] ''[[commons:Dactylopterus volitans|Dactylopterus volitans]]'' (Flying gurnard)
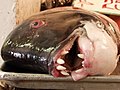
Image:Fishmarket 01.jpg|''[[commons:Semicossyphus pulcher|Semicossyphus pulcher]]'' (California Sheephead)
Image:Pseudorasbora parva(edited version).jpg|''[[commons:Category:Pseudorasbora parva|Pseudorasbora parva]]'' (Topmouth gudgeon)
Image:MC Rotfeuerfisch.jpg|''[[commons:Category:Pterois antennata|Pterois antennata]]'' (Antennata Lionfish)
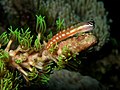
Image:Cleaning station konan.jpg|''[[commons:Novaculichthys taeniourus|Novaculichthys taeniourus]]''
Image:Synchiropus splendidus 2 Luc Viatour.jpg|''[[commons:Synchiropus splendidus|Synchiropus splendidus]]'' (Mandarin fish)
File:Psetta maxima Luc Viatour.jpg|''[[commons:Psetta maxima|Psetta maxima]]'' (Turbot)
File:Australian blenny.jpg|''[[commons:Category:Ecsenius|Ecsenius axelrodi]]''
</gallery>
Gives (mode: packed-hover):
-
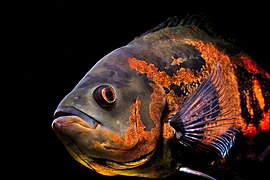 Astronotus ocellatus (Oscar)
 -
 Salmo salar (Salmon Larva)
 -
 Epinephelus lanceolatus (Giant grouper)
 -
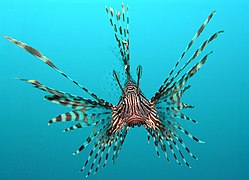 Pterois volitans (Red Lionfish)
 -
 Macropodus opercularis (Paradise fish)
 -
 Canthigaster valentini (Valentinni's sharpnose puffer)
 -

 Dactylopterus volitans (Flying gurnard)
 -
 Semicossyphus pulcher (California Sheephead)
 -
 Pseudorasbora parva (Topmouth gudgeon)
 -
 Pterois antennata (Antennata Lionfish)
 -
-
 Synchiropus splendidus (Mandarin fish)
 -
 Psetta maxima (Turbot)
 -


.jpg)


.jpg)


Examples of the other modes:
mode="traditional"
-
 Astronotus ocellatus (Oscar)
 -
 Salmo salar (Salmon Larva)
 -
 Epinephelus lanceolatus (Giant grouper)
mode="nolines"
-
Astronotus ocellatus (Oscar)
-
Salmo salar (Salmon Larva)
-
Epinephelus lanceolatus (Giant grouper)
mode="packed"
-
Astronotus ocellatus (Oscar)
-
Salmo salar (Salmon Larva)
-
Epinephelus lanceolatus (Giant grouper)
mode="packed-overlay"
-
Astronotus ocellatus (Oscar)
-
Salmo salar (Salmon Larva)
-
Epinephelus lanceolatus (Giant grouper)
mode="packed-hover"
-
Astronotus ocellatus (Oscar)
-
Salmo salar (Salmon Larva)
-
Epinephelus lanceolatus (Giant grouper)
| MediaWiki version: | ≥ 1.28 |
mode="slideshow"
-
Astronotus ocellatus (Oscar)
-
Salmo salar (Salmon Larva)
-
Epinephelus lanceolatus (Giant grouper)
-
 Pterois volitans (Red Lionfish)
 -
 Macropodus opercularis (Paradise fish)
 -
 Canthigaster valentini (Valentinni's sharpnose puffer)
 -
 Dactylopterus volitans (Flying gurnard)
 -
 Semicossyphus pulcher (California Sheephead)
 -
 Pseudorasbora parva (Topmouth gudgeon)
 -
 Pterois antennata (Antennata Lionfish)
 -

-
 Synchiropus splendidus (Mandarin fish)
 -
 Psetta maxima (Turbot)
 -
Optional gallery attributes
The gallery tag itself takes several additional parameters, specified as attribute name-value pairs:
<gallery {parameters}>
{images}
</gallery>
caption="{caption}": (caption text between double quotes for more than a word) sets a caption centered atop the gallery. Only plain text may be used in the caption; formatting, templates and the like will not work.
widths={width}px: sets the (max) widths of the images; the default value is 120px.
(It has no effect if mode is set to one of the following: packed, packed-overlay, packed-hover, slideshow.) Note the plural: widths.
heights={heights}px: sets the (max) heights of the images; the default value is 120px.
(It has no effect if mode is set to slideshow.)
perrow={integer}: sets the number of images per row.
(It has no effect if mode is set to one of the following: packed, packed-overlay, packed-hover, slideshow.) 0 means automatically adjust based on width of screen.
showfilename={anything}: Show the filenames of the images in the individual captions for each image (1.17+).
mode={traditional|nolines|packed|packed-hover|packed-overlay|slideshow}: See section above (1.22+; 1.28+ for "slideshow").
showthumbnails: For "slideshow" mode only, display the strip with image thumbnails below the slideshow by default (1.29+).
- Example 1
Syntax:
<gallery widths=300px heights=200px>
File:Example.jpg|Lorem ipsum
File:Example.jpg|Lorem ipsum dolor sit amet, consetetur sadipscing elitr, sed diam nonumy eirmod tempor invidunt ut
</gallery>
Result:
-
 Lorem ipsum
 -
Lorem ipsum dolor sit amet, consetetur sadipscing elitr, sed diam nonumy eirmod tempor invidunt ut
- Example 2
Syntax:
<gallery widths=60px heights=60px perrow=7 caption="sunflowers are groovy">
File:Example.jpg
File:Example.jpg
File:Example.jpg
File:Example.jpg
File:Example.jpg
File:Example.jpg
File:Example.jpg
File:Example.jpg
File:Example.jpg
File:Example.jpg
</gallery>
Result:
- sunflowers are groovy
-

-
-
-
-
-
-
-
-
-
Row of images that will wrap to browser width
One way that works for a row of images with varying widths is not to use "thumb" or "left" or "none". If "thumb" is not used (and thus no captions) a row of images will wrap to the browser width. If necessary, narrow the browser window to see the images wrap to the next row.
[[File:Example.jpg|220px]]
[[File:Example.jpg|100px]]
[[File:Example.jpg|150px]]
[[File:Example.jpg|250px]]
[[File:Example.jpg|200px]]
[[File:Example.jpg|50px]]
[[File:Example.jpg|220px]]
[[File:Example.jpg|175px]]
![]()
To wrap images of varying widths with captions it is necessary to use div HTML for an unordered list. Along with style="display: inline-block;". For more info and ideas see: Give Floats the Flick in CSS Layouts.
<div><ul>
<li style="display: inline-block;"> [[File:Example.jpg|thumb|none|220px|Caption 1]] </li>
<li style="display: inline-block;"> [[File:Example.jpg|thumb|none|100px|Caption 2]] </li>
<li style="display: inline-block;"> [[File:Example.jpg|thumb|none|150px|Caption 3]] </li>
<li style="display: inline-block;"> [[File:Example.jpg|thumb|none|250px|Caption 4]] </li>
<li style="display: inline-block;"> [[File:Example.jpg|thumb|none|200px|Caption 5]] </li>
<li style="display: inline-block;"> [[File:Example.jpg|thumb|none|50px|Caption 6]] </li>
<li style="display: inline-block;"> [[File:Example.jpg|thumb|none|220px|Caption 7]] </li>
<li style="display: inline-block;"> [[File:Example.jpg|thumb|none|175px|Caption 8]] </li>
</ul></div>
-
Caption 1 -

Caption 2 -
Caption 3 -

Caption 4 -
Caption 5 -

Caption 6 -
Caption 7 -

Caption 8
To align the top edge of images add the vertical-align command
<div><ul>
<li style="display: inline-block; vertical-align: top;"> [[File:Example.jpg|thumb|none|220px|Caption 1]] </li>
<li style="display: inline-block; vertical-align: top;"> [[File:Example.jpg|thumb|none|100px|Caption 2]] </li>
<li style="display: inline-block; vertical-align: top;"> [[File:Example.jpg|thumb|none|150px|Caption 3]] </li>
<li style="display: inline-block; vertical-align: top;"> [[File:Example.jpg|thumb|none|250px|Caption 4]] </li>
<li style="display: inline-block; vertical-align: top;"> [[File:Example.jpg|thumb|none|200px|Caption 5]] </li>
<li style="display: inline-block; vertical-align: top;"> [[File:Example.jpg|thumb|none|50px|Caption 6]] </li>
<li style="display: inline-block; vertical-align: top;"> [[File:Example.jpg|thumb|none|220px|Caption 7]] </li>
<li style="display: inline-block; vertical-align: top;"> [[File:Example.jpg|thumb|none|175px|Caption 8]] </li>
</ul></div>
-
Caption 1 -
Caption 2 -
Caption 3 -
Caption 4 -
Caption 5 -
Caption 6 -
Caption 7 -
Caption 8
Some wiki farms do not have all gallery options (such as "widths"). Also, sometimes one wants varying widths for images in a row. Outside of a gallery, or the div HTML, it is impossible to have individual captions for images in a row of images that will wrap to the browser width. Try it and see. Nothing else using wikitext works correctly. Images will either overlap stuff on the right, or force a horizontal scroll bar.
Using a left float ("left") for some images, combined with "none" for some of the images, will not work consistently either, especially if there is also a right sidebar of images. Weird things will occur. At narrower browser or screen widths an image out of the row may appear far down the page after the end of the right sidebar of images.
Link behavior
By default an image links to its file description page. The "link=" option modifies this behavior to link to another page or website, or to turn off the image's linking behavior.
Alternatively, you can create a text link to a file description page or to the file itself. See Help:Enllaçar cap a fitxers.
Display image, link it to another page or website
Use "link=" option to link image to another page or website:
Clicking on the below image will take you to MediaWiki:
[[File:MediaWiki-2020-logo.svg|50px|link=MediaWiki]]
![]()
Clicking on the below image will take you to example.com:
[[File:MediaWiki-2020-logo.svg|50px|link=http://example.com]]
![]()
Display image, turn off link
Use "link=" option with no value assigned to turn link off entirely; the below image is not a link:
[[File:MediaWiki-2020-logo.svg|50px|link=]]
![]()
Link to an image
Add : as a prefix to the link you need to create.
[[:File:MediaWiki-2020-logo.svg]]
[[:File:MediaWiki-2020-logo.svg|Wiki]]
Directly linking to an image
The above examples link to the image's description page.
To directly link to an image, the pseudo-namespace Media: can be used on MediaWiki pages:
[[Media:MediaWiki-2020-logo.svg]]
Direct links from external sites
Another possibility is to use the Special:Redirect/file page (or its alias Special:Filepath). Unlike the above example, you can link to it from external websites as well as from MediaWiki pages.
[[Special:Redirect/file/Wikipedia.png]]
The parameters height and width can also be added to return a specific size of the image.
The image aspect ratio is always preserved.
https://www.mediawiki.org/w/index.php?title=Special:Redirect/file/Wikipedia.png&width=100&height=100
Obtaining the full URL of an image
To obtain the full path of an image (without going through redirects as shown above), some Paraules màgiques can be used.
{{filepath:MediaWiki-2020-logo.svg}}
Becomes:
- //upload.wikimedia.org/wikipedia/commons/d/dd/MediaWiki-2020-logo.svg
In the event that this is used from a template where the File: namespace needs to be removed, {{PAGENAME}} can do so:
{{filepath:{{PAGENAME:File:MediaWiki-2020-logo.svg}}}}
Becomes:
- //upload.wikimedia.org/wikipedia/commons/d/dd/MediaWiki-2020-logo.svg
Files at other websites
You can link to an external file available online using the same syntax used for linking to an external web page. With these syntaxes, the image will not be rendered, but only the text of the link to this image will be displayed.
[http://url.for/some/image.png]
Or with a different displayed text:
[http://url.for/some/image.png link text here]
Additional MediaWiki markup or HTML/CSS formatting (for inline elements) is permitted in this displayed text (except for embedded links that would break the surrounding link):
[http://www.example.com/some/image.png Example '''<del>rich</del>''' ''<ins>link text</ins>'' here.]
which renders as:
If it is enabled on your wiki (see Manual:$wgAllowExternalImages), you can also embed external images. To do that, simply insert the image's URL:
http://url.for/some/image.png
Embedded images can be resized by the CSS transform property. They also may be formatted by surrounding MediaWiki markup or HTML/CSS code.
If this wiki option is not enabled, the image will not be embedded but rendered as a textual link to the external site, just like above, unless the site's Manual:$wgAllowExternalImagesFrom has a value.